JodoHost Offer Wordpress Hosting on Windows/Linux Servers - Try it today
Before proceeding for installation, kindly make sure all steps are done in section "Preparation Before installing Wordpress"
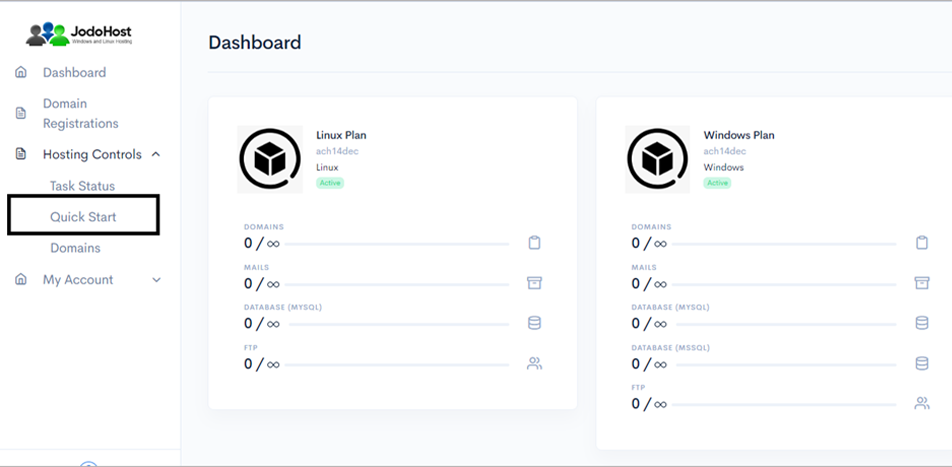
Login into the OpsPi Platform as an End-user. You will land on the OpsPi Dashboard.
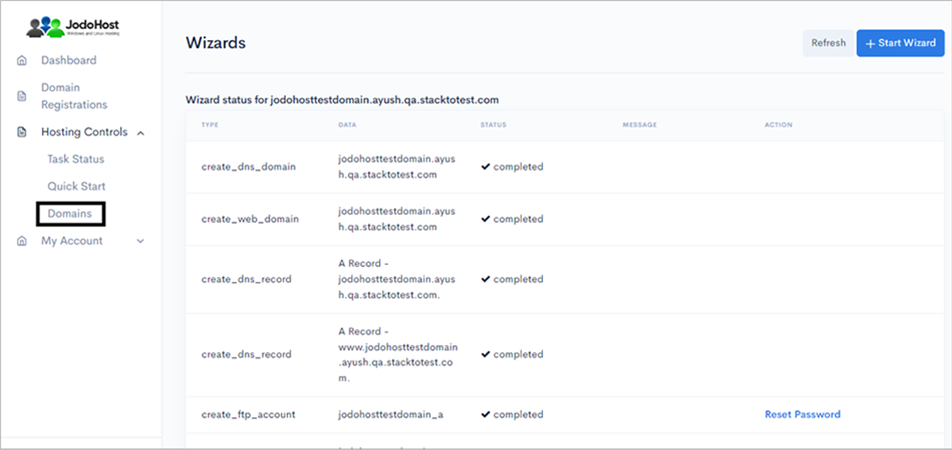
Click on the option “Quick Start” under “Hosting Controls”.
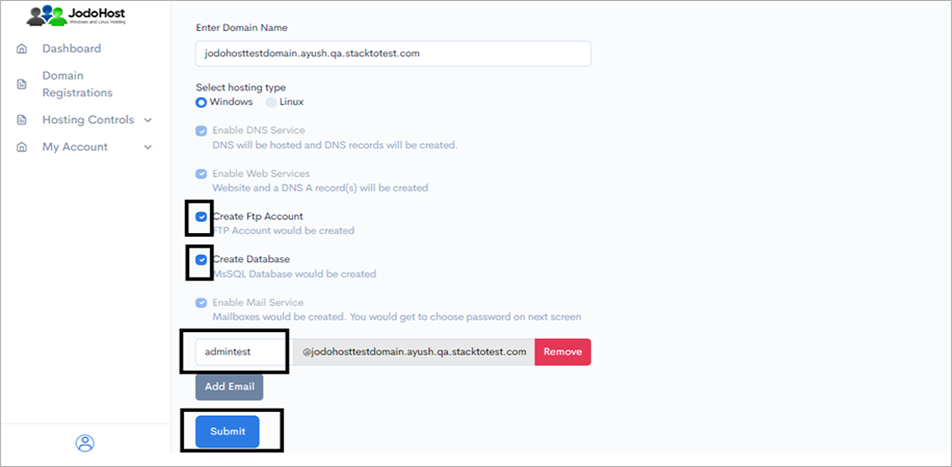
Enter the required details. Domain name, choose to create FTP Account and Database Account.
Enable Mail services and add at least one email ID. Then Submit
You will enter the Wizard page. Please wait for a few moments and click on Refresh button to find the status of all your services complete.
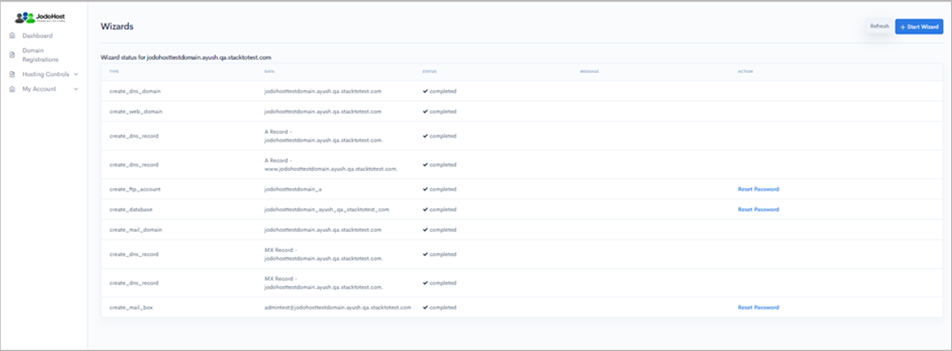
After ensuring that the status for all the services have been completed, choose the option “Domains” under “Hosting control .
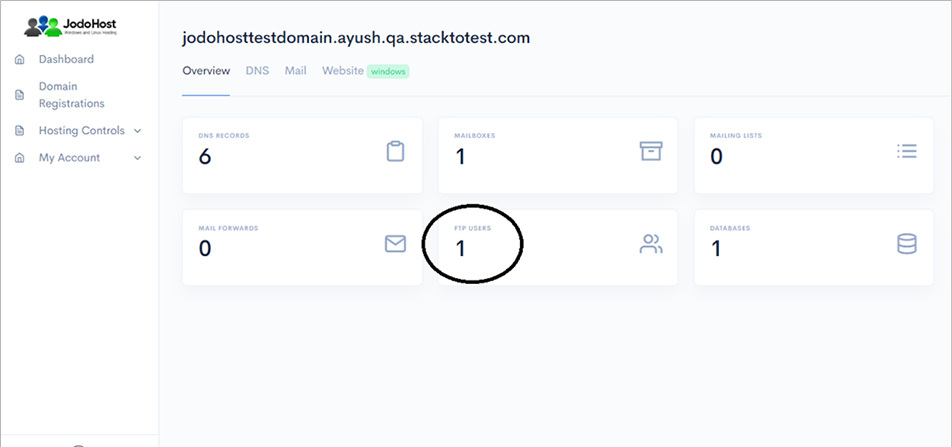
Choose the domain which was created
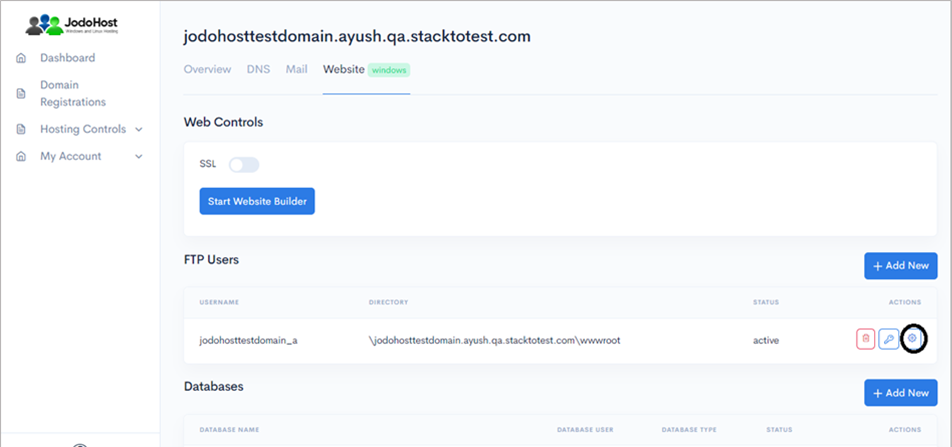
You will enter the Domain Overview page. Click on the option “FTP Users”
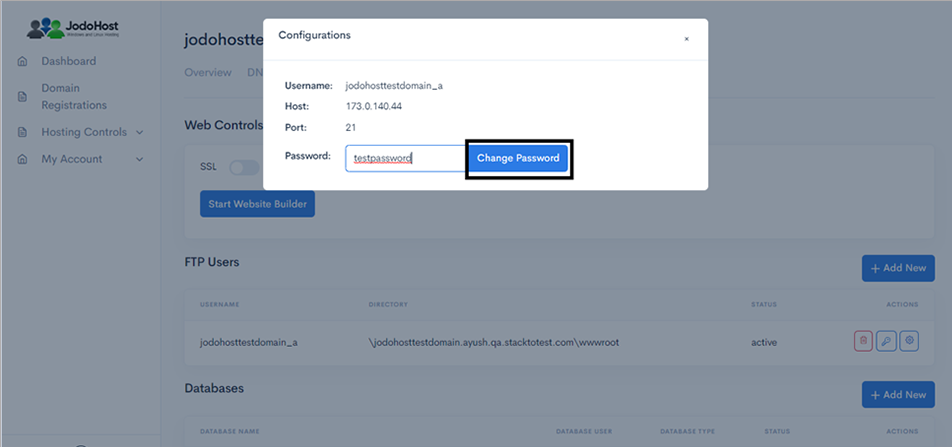
Click on the configuration button to retrieve the FTP details and also set the new password.
Enter the new password and choose to “change password”
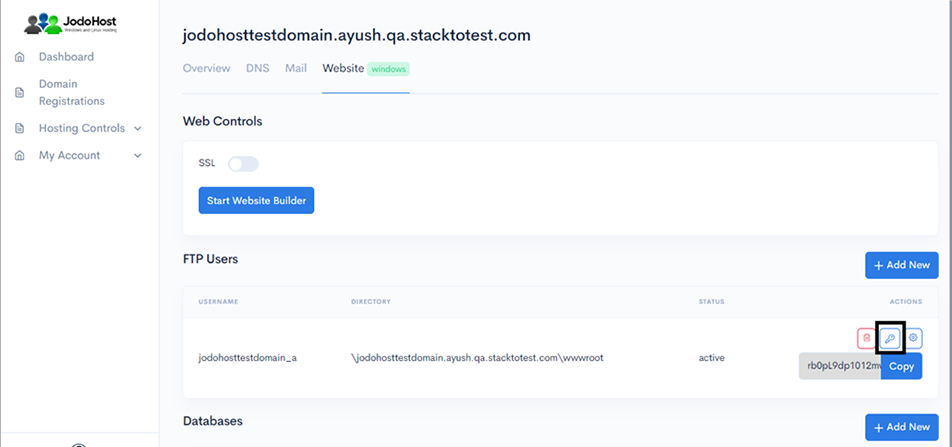
You can also choose to reset the password and use it by choosing the “key” option.
Download WordPress Download and unzip the WordPress Package (https://wordpress.org/download) .
Creating Database Create a MySQL database for WordPress on your Web Server/Database Server as well as a MySQL user who has all privileges for accessing and modifying the Database.
Upload WordPress files If you want to integrate WordPress into the root of your domain (e.g. http://yourdomain.com/), move or upload all contents of the unzipped WordPress directory (excluding the WordPress directory itself) into the root directory of your web server. If you want to have your WordPress installation in its own subdirectory on your website (e.g. http://yourdomain.com/subdirectory/), create the subdirectory on your server and upload the contents of the unzipped WordPress package to the directory via FTP.
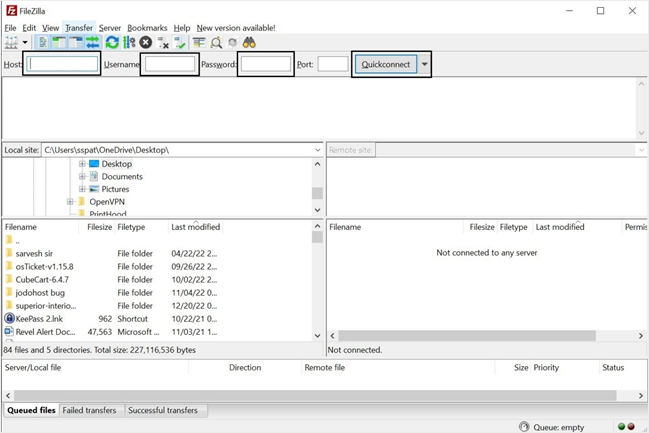
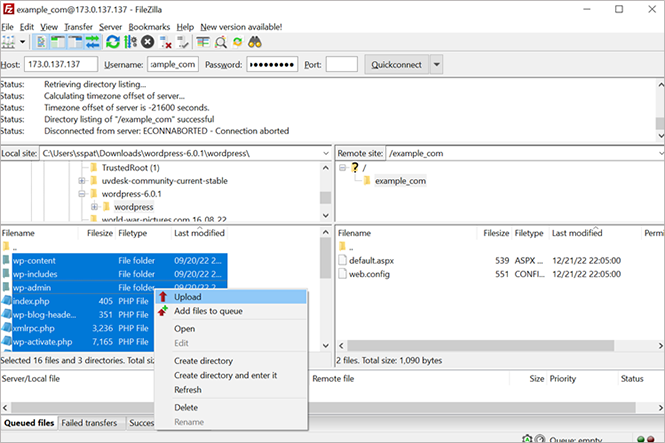
Connecting FTP Client Open FileZilla FTP client. Enter Host, Username, Password and the click on Quickconnect. (Refer to Step 9)
Select the files appropriate folder from Left Pane (Local site). Then right click and select upload. And wait for the files finished transfer.
Configuring WordPress Run the WordPress installation script by accessing the URL in a web browser. This should be the URL where you uploaded the WordPress files. (Ex: http://yourdomain.com or, http://yourdomain.com/subdirectory )
Select the Language >> Click Continue In the Database configuration page click on Let’s Go

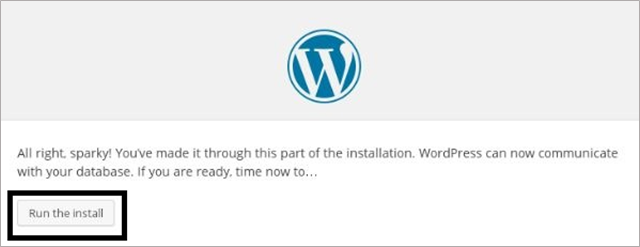
Enter the Database Name, Database Username, Database Password, Database Host IP, Select the Table Prefix >> Click on Submit .

Click on Run the Installation .
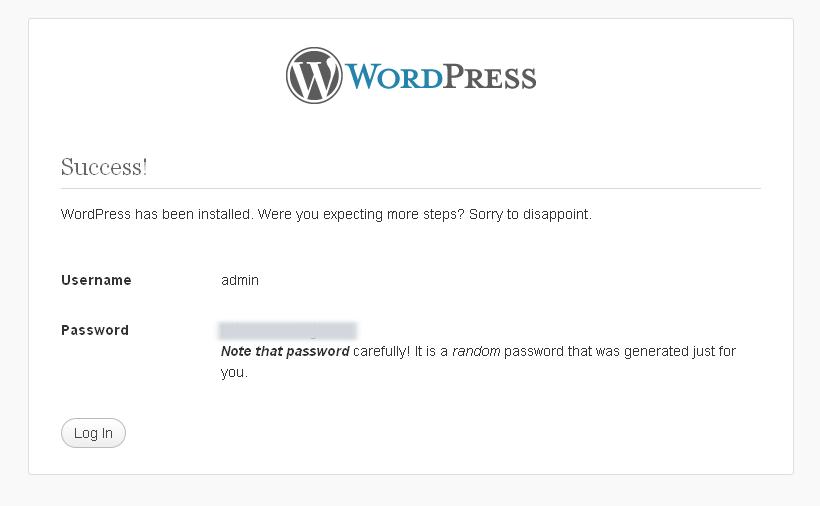
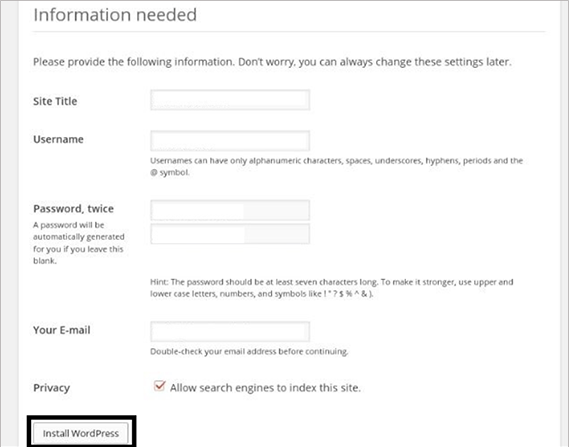
In the Next Screen, Enter the Site Title, User name, Password, Email and Click Install WordPress Button to display next page. (Note – The username and password will the admin user to access the WordPress site)
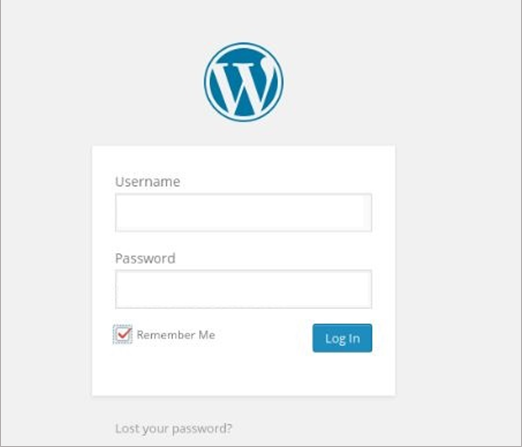
In the Next Screen, Enter your given User name and password and click login Button.
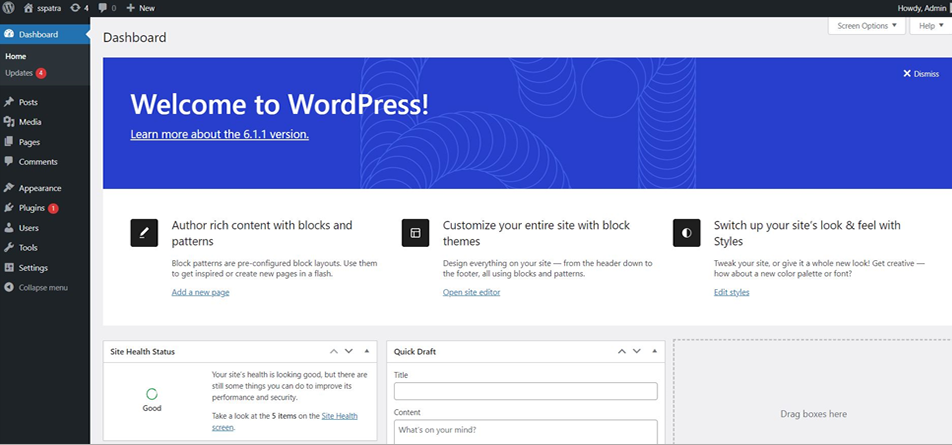
Now it will show your site dashboard display.