Preparation before Installation

| 1. |
Ensure Joomla files have been uploaded to domain directory. |
| 2. |
Ensure Database has been created in Hsphere. Follow the Steps to create a MySQL database:
| i. |
Login to your Hsphere Control Panel |
| ii. |
Select MySQL in the Databases menu and MySQL DB creation Wizard automatically appears. |
| iii. |
On the form that shows enter the name of the database and database description if needed: |
| |
 |
| iv. |
Agree with additional charges if any. |
| v. |
In the form that appears, create a new user or grant privileges to users of other databases: |
| |
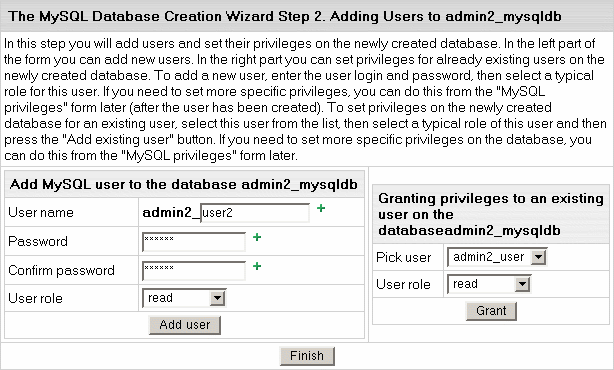 |
|
| |
Note: New MySQL databases are created with the username_ prefix, where username is a unique identifier that contains either first letters of the name of an account under which this database is created, or that account name's first letters and a unique number if there are several account names starting with the same letters. This is done to prevent the creation of databases with the same name under different users. |
|
| vi. |
Add a new user to the database you have just created, choose user role and Click Add user. User roles are explained below.. |
| vii. |
Choose roles for users of other databases so they can use your new database. Click Grant. |
| viii. |
Click Finish to complete creating your MySQL database. |
|
|
| 3. |
“Network Service permission” is set to modify on domain directory. (In Hsphere you can not set permission. You have to send us ticket. We will do it for you.) |
| 4. |
Database user has Full permission. |
| 5. |
Make sure required php.ini file should place in domain folder and do customization as per pre installation check requirement. |
|
| |
|
Joomla Installation Steps
Before proceeding for installation, kindly make sure all steps are done in section "Preparation Before installing Joomla"
On first page you need to choose Language from drop down menu and click on Next
Next page is for pre-installation check, some option are given at right side of the page,
If all showing Yes then click on Next and
if any option showing No then need to correct and then click on Check Again .
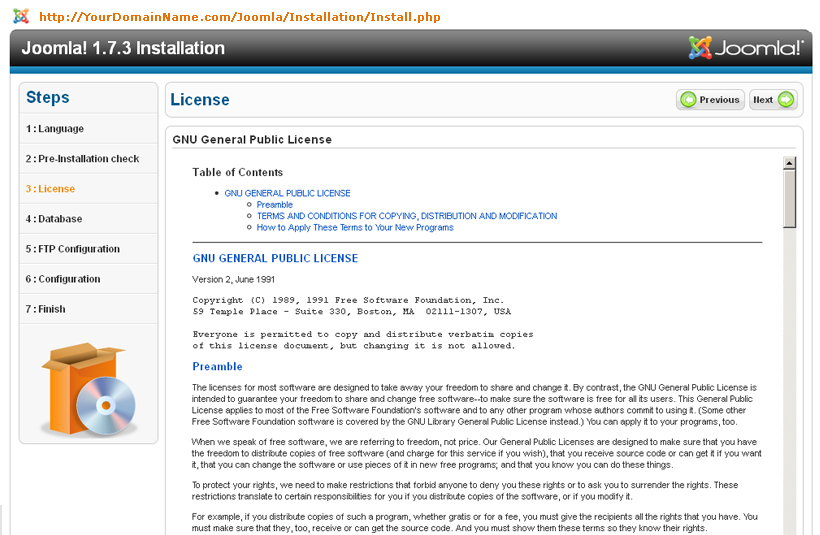
License page need to be check / read and then click on Next
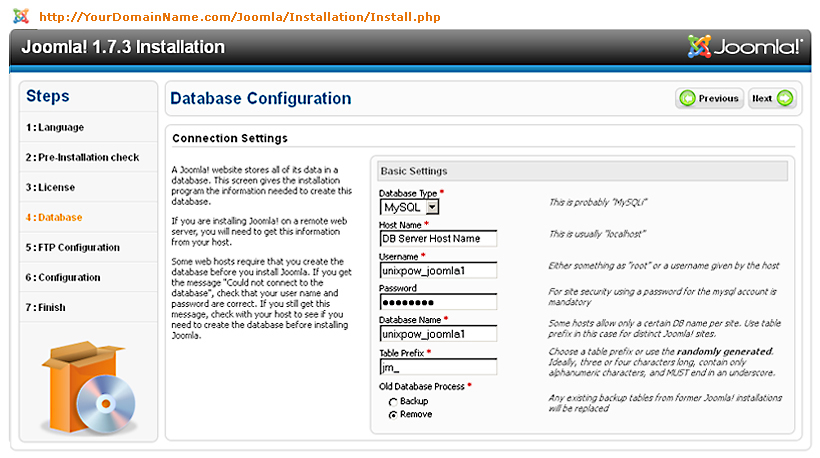
At Database Configuration page you need to fill database details in the
given fields and click Next
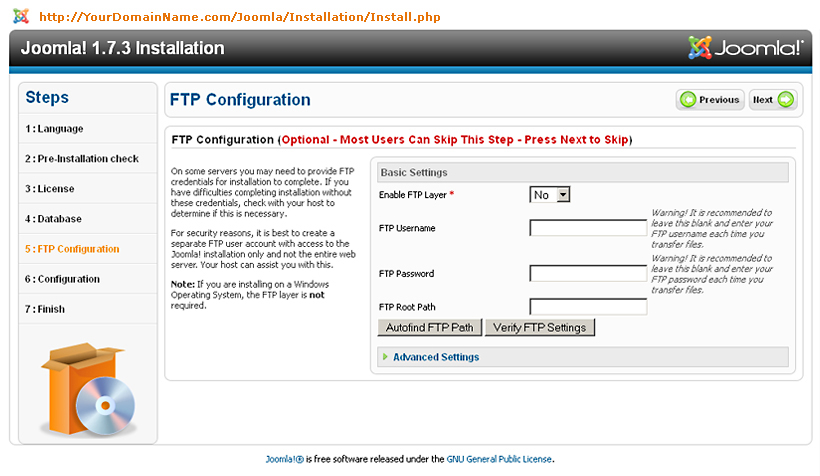
Skip FTP Configuration page and click on Next
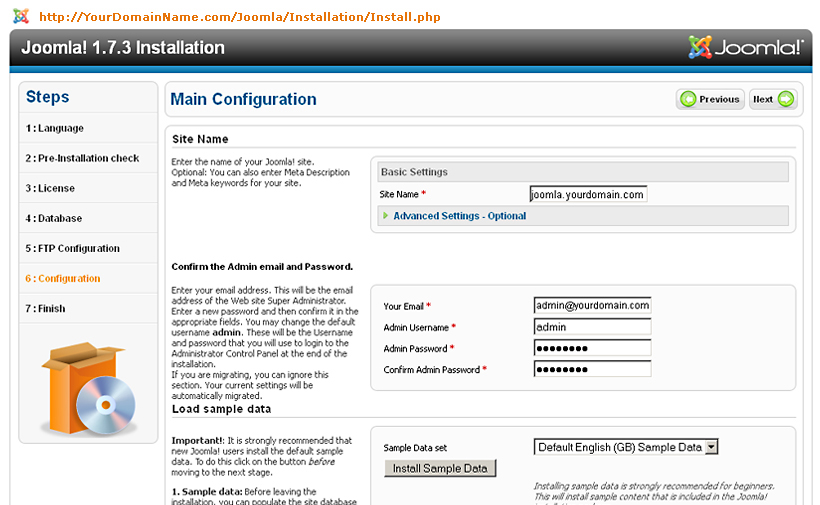
At Main Configuration page which need site and admin section details (email id, admin username and admin password) and click Next
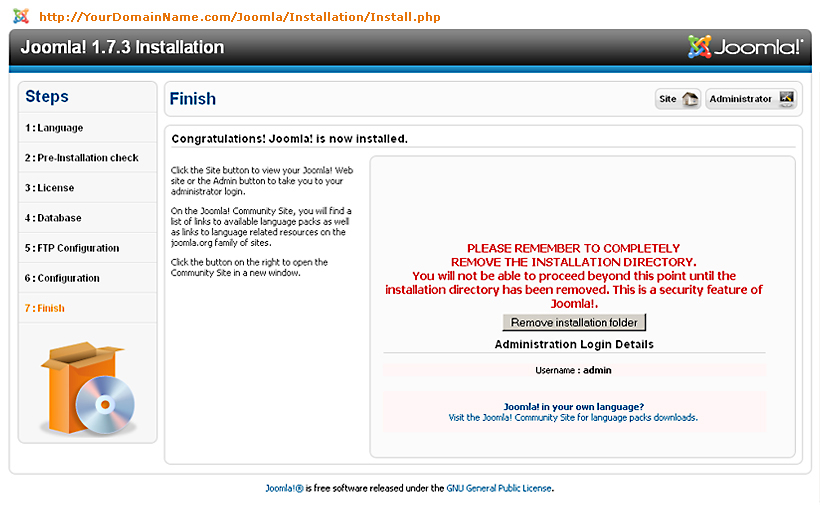
You can see Installation finish page, with Administration login details. Copy these administrator login details for further use.
Then you may click on Administrator button to enter in admin section and use Administrator login details to login in Admin Control panel.